| 7,000+ Reviews
 Free EU Shipping above 100€*
 400,000+ Customers Worldwide
 Worldwide Tracked Shipping

The Plyo Box from GORNATION adds explosive power to your training and is the perfect tool for calisthenics athletes and fitness fans who want to improve their strength and dynamics. Makeshift solutions like chairs or unstable platforms are risky and limit your progress. A solid wooden box, on the other hand, opens up a whole new level of exercises: jumps, step-ups, split squats, core work or even dips – all safe and effective. To make sure you can use your Plyo Box right away, we’ve prepared a detailed step-by-step assembly guide for you.
What you need for assembly
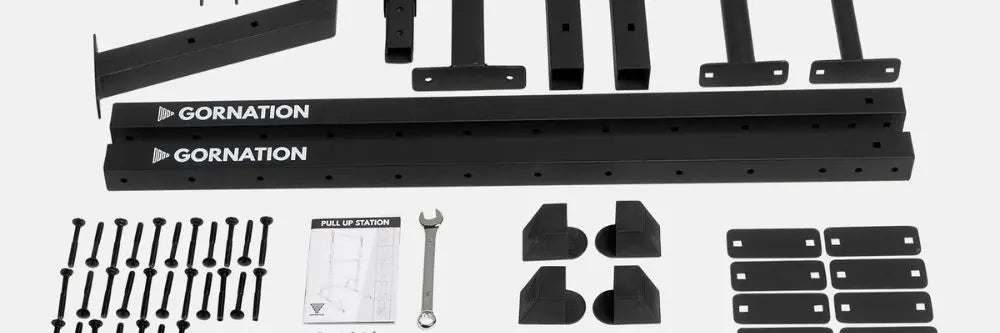
Before you start, get all the parts ready. Every GORNATION Plyo Box includes the bottom plate, the top plate, the two side panels, the front and back panel as well as the stabilizing inner struts. You’ll also find all the screws you need to get started right away.

For smooth assembly you only need a few tools: a Phillips screwdriver or, even better, a cordless drill with the right bit. We recommend setting up on a clean, flat surface so you can align everything properly. Having all tools at hand saves time and avoids interruptions during the build.
Step-by-step assembly guide
Step 1 – Build the inner struts
The first step for stability: the inner struts. They give your Plyo Box the strength it needs to stay solid even during intense jumps. Screw the parts together carefully and check that everything lines up. Don’t overtighten the screws. Once done, put the struts aside until you need them later.

Step 2 – Connect the bottom plate with the side panels
Now it’s time to shape the structure. Place the bottom plate and screw it to the two side panels. Make sure everything is flush and aligned at right angles. Tighten the screws only lightly at this stage so the final assembly fits perfectly together later.
Step 3 – Mount the front and back panel
Next up are the front and back panels. They give the box its closed shape. Align them precisely, make sure the corners fit cleanly and then fix them with screws. The basic frame of your Plyo Box is now complete.

Step 4 – Insert struts & attach the top plate
Before closing the box, insert the inner struts. They make sure your Plyo Box stays stable under heavy loads without warping. Position them in the middle and slide them in evenly.
Then add the top plate. Place it precisely on top, check that all edges are flush and screw it down securely so it sits firm and level.

Step 5 – Safety check
Before training, always run a safety check. Place your Plyo Box on a solid, non-slip surface and test its stability with simple moves first. Step-ups or leaning on it lightly are perfect to see if it holds steady. If everything feels solid, move on to jumps or dips. This ensures you can train without risks.
Assembly video: Set up your Plyo Box safely
To make assembly even easier, we created a detailed assembly video. It shows you every step: from the struts to the side panels and the final top plate. Follow along visually and build your box in real-time. This saves time and ensures a stable, long-lasting setup.
With your assembled GORNATION Plyo Box you’ve built a solid base for versatile workouts. From jumps and step-ups to functional strength training - the box gives you countless ways to improve strength, endurance and coordination. Take the time for a clean build, test stability thoroughly and enjoy your training afterwards.